This mom loves to cook

My photo
Hello! I'm Deirdre and I'm a stay at home mom to two boys. Cooking for a 6 and 4 year old- day in and day out can be the best job in the world, also the most frustrating. Trying to create not only kid friendly but husband and mom friendly meals is a challenge that I've readily accepted! My Foodie Mom blog is a record of the different recipes that I've tried in the kitchen, pictures of my ventures, and cool tricks I've picked up along the way. Cheers!

Monday, January 27, 2014

Jalapeño Cheddar Scalloped Potatoes


I've made scalloped potatoes before, but always made the mistake of taking them out too soon and the potatoes were still undercooked. This time I made sure they cooked through and this recipe came out amazing!! It was super easy too, took only about 15 minutes to prepare. 

INGREDIENTS:
  • 3-4 medium potatoes (peeled if thick skinned)
  • 2 Tablespoons unsalted butter
  • 1 small chopped onion
  • 1/2 jalapeño pepper chopped
  • 3 Tablespoons all-purpose flour
  • 2 cups milk 
  • 1 teaspoon mustard
  • Pinch cayenne pepper
  • paprika
  • 1 teaspoon salt
  • 1 cup cheddar cheese
  • green onion for topping at end

Preheat oven to 350 degrees F. Cut potatoes into 1/4-inch thick slices and set aside. I put mine through my food processor and it took like a minute.
In a medium saucepan over medium heat, melt butter. Add onion and jalapeño and cook for 5 minutes, stirring occasionally. Whisk in flour and cook for 1 minute. Whisk in milk,  mustard, cayenne pepper and salt. Bring to a boil over high heat, stirring occasionally. Reduce heat and simmer for 3 minutes or until thickened, stirring frequently.
Arrange half of potato slices in a lightly greased 9-inch square glass baking dish or i used a round pie dish. Spread half of milk mixture over potatoes and top with 1/2 of the cheese. Repeat layering with remaining potatoes, milk mixture and cheese. Sprinkle a little salt and paprika on the top.
Bake for about 1 hour, until the potatoes are tender and the cheese is brown hot and bubbly. Garnish with some chopped green onion.


Saturday, January 25, 2014

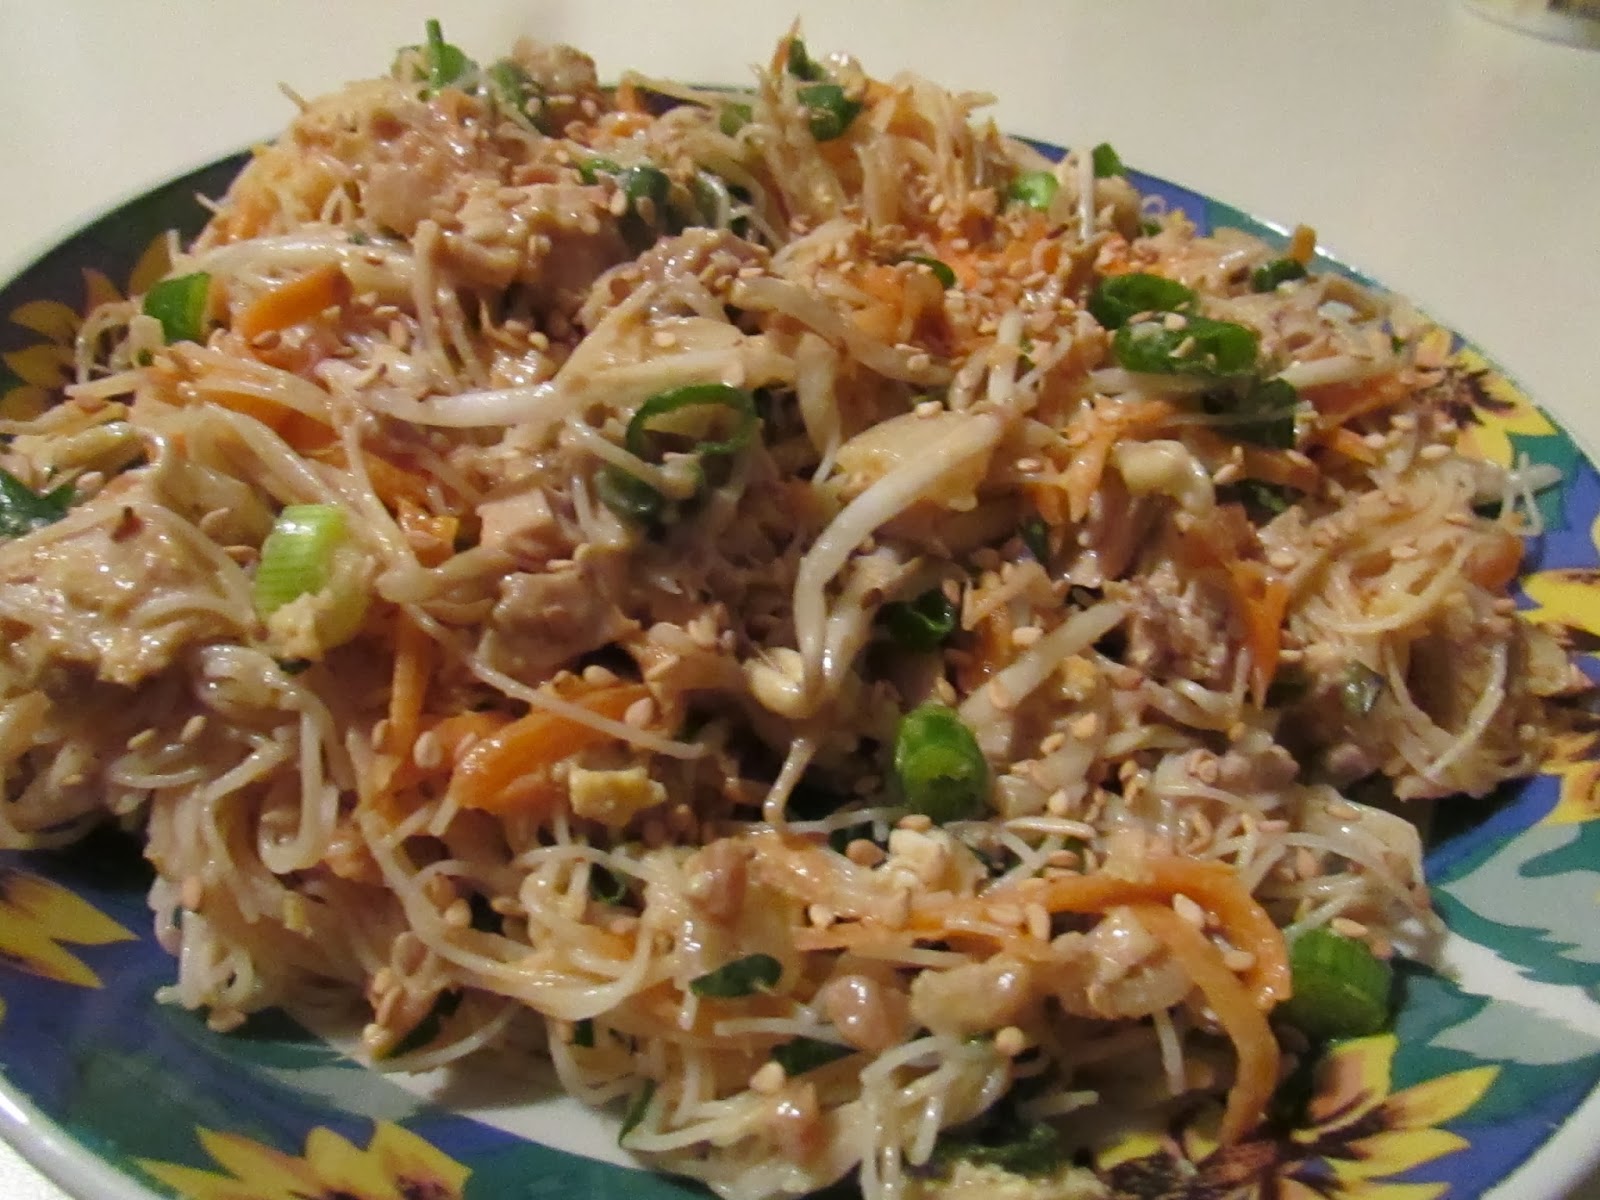
Pad Thai


After roasting a turkey last week I feel like I've been using the leftovers for days. Mike told me I just had to make a pad thai… So I did. Of course you can replace the turkey for chicken and do a traditional chicken pad thai or no meat at all for a veggie option. It's up to you!

INGREDIENTS:

For peanut sauce:

  • 3/4 cup chunky peanut butter
  • 1 can full fat coconut milk
  • 2 tablespoons red thai curry paste
  • 2 teaspoons apple cider vinegar 
  • 1 1/2 cups shredded or cubed turkey (or chicken or no meat at all for veggie)
For pad thai:
  • 2 tablespoons veggie oil
  • 1 yellow onion diced
  • 3 cloves garlic minced
  • 1 tablespoon minced ginger
  • 3 eggs slightly beaten
  • 1 large carrot grated
  • 1/2 cup chopped cilantro
  • 2 cups bean sprouts
  • 1/4 cups diced green onions (scallions)
  • 2 cups dry rice noodles
Start by making the sauce, we want to add the peanut butter, coconut milk, curry paste, vinegar into a sauce pan and bring to a light boil. Reduce heat to low and add in the turkey so it absorbs the flavor.

Meanwhile put the rice noodles into a bowl of warm water for a few minutes to soften them.

In a large cast iron skillet add the veggie oil and heat up over medium heat. Add in the onion and sauté until softened. Add in the garlic and ginger and cook for another 1-2 minutes. 

Add in the beaten eggs, and cook thoroughly (making a scrambled egg essentially).

Add in the softened, drained rice noodles, and the peanut sauce with turkey. stirring for a few minutes combining the ingredients.

Finally remove from heat and toss in the green onions, carrots, and bean sprouts. Top with peanuts if desired.


My husband and my dad raved about this for days afterwards, and I'll take their word for it that it was delicious. I wasn't feeling well that night so I went to bed without eating. But, it was all gone in the morning, so I assume that it was good!! If you like pad thai and have had it before than you will enjoy making this at home! Super easy and healthy! You can also just completely omit the turkey and make this a vegetarian dish. Cheers!


Credits: turkey pad thai

Roasted Sweet Potato and Black Bean Burgers


I made these last night in a size a little smaller than a regular burger, but not as small as a slider. They came out fantastic! Another lovely addition to my veggie burger recipes. I will most certainly make these again.

INGREDIENTS:

For Roasted Sweet Potato Bits:
  • 1 medium sized sweet potato
  • 3 tablespoon olive oil
  • 2 teaspoons chili powder
  • 1/4 teaspoon salt
  • 1/8 teaspoon cumin
For Burgers:
  • 1 batch of chilled Roasted Sweet Potato Bits
  • 1 can cooked black beans, rinsed and drained
  • 1  small yellow onion roughly chopped
  • 1/2 of a fresh jalapeno, stemmed, seeded and roughly chopped
  • 2-3 cloves garlic, peeled, and roughly chopped
  • 2 tablespoons ketchup
  • 3/4 cup fresh cilantro 
  • 1/2 teaspoon salt 
  • 1/2 teaspoon cumin
  • 1 cup panko bread crumbs 
  • 1 egg
  • onion rings for topping
  • paprika chipotle sauce for topping
To make the roasted sweet potato bits, preheat oven to 400 and line a baking sheet with parchment paper.

Chop sweet potato into small bite sized cubes, and combine with seasoning and oil in a ziplock bag. Shake until they are well coated.

Place sweet potatoes on the lined baking sheet and roast for about 15 minutes, until they are soft and are starting to caramelize. Set aside to cool.


To make the burgers, first add the onion, garlic and jalapeño into the food processor and pulse until the ingredients are finely chopped (scrape down the sides and repeat if necessary.) 

Add half of the black beans, half of the sweet potato bits, cilantro, cumin and salt into the food processor with the finely chopped veggies, and pulse (scraping down sides if needed) until it becomes a chunky cohesive paste.

Scrape this mixture into a bowl and add the rest of the black beans, sweet potato bits, panko and egg. Mix until combined. If the mixture seems to wet add in a little more panko, you want to be able to form these guys into patties without it being to sticky.


Roll the mixture into balls about the size of the patties you want. This made about 9 small/ medium sized patties.

In a large cast iron skillet heat up just enough veggie oil to cover the bottom of the pan. Flatten each ball into the size patty you want, and when the oil is hot- fry the patties for about 4 minutes on each side until they are brown and crusty. Don't over crowd the pan- you can fry them in batches.

Place on a plate with paper towel to soak up the access oil.

Serve on a bun with crispy onion rings and paprika chipotle sauce.


There was just something about this awesome burger, you can taste the sweet potato- cumin and the amazing fresh cilantro… then that special sauce I made, with just a little kick and salty lemon peel in it. It was so yum! Everyone enjoyed them, and none of us are vegetarians. Cheers!

Paprika Chipotle Sauce


I made this sauce last night to go with my roasted sweet potato and black bean burgers. It was amazing and I made a whole jar of it to keep in the fridge, because I know that I'll be using it on a ton of other things too.

INGREDIENTS:

  • 2 cups mayo
  • 3 chipotles in adobo sauce (from can)
  • 3 tablespoons paprika
  • 2 garlic cloves peeled and chopped
  • 2 teaspoons preserved lemon peels in salt (see below for instructions)
Combine all ingredients in a food processor or blender and blend until smooth. DO NOT over blend this, if it is processed to much the mayo can separate. Store in a jar and refrigerate.

To make the preserved lemon peels:

Peel the lemon and put slices of the peel into a small container and cover with salt. Add the lid and shake so it is well coated. Leave at room temperature and replenish the lemon peels when needed. 


I made the lemon peels as shown above, because the sauce called for it. I'm not sure when I will use the rest of it, but it defiantly did give the sauce a little something extra. It was super yummy! Enjoy!


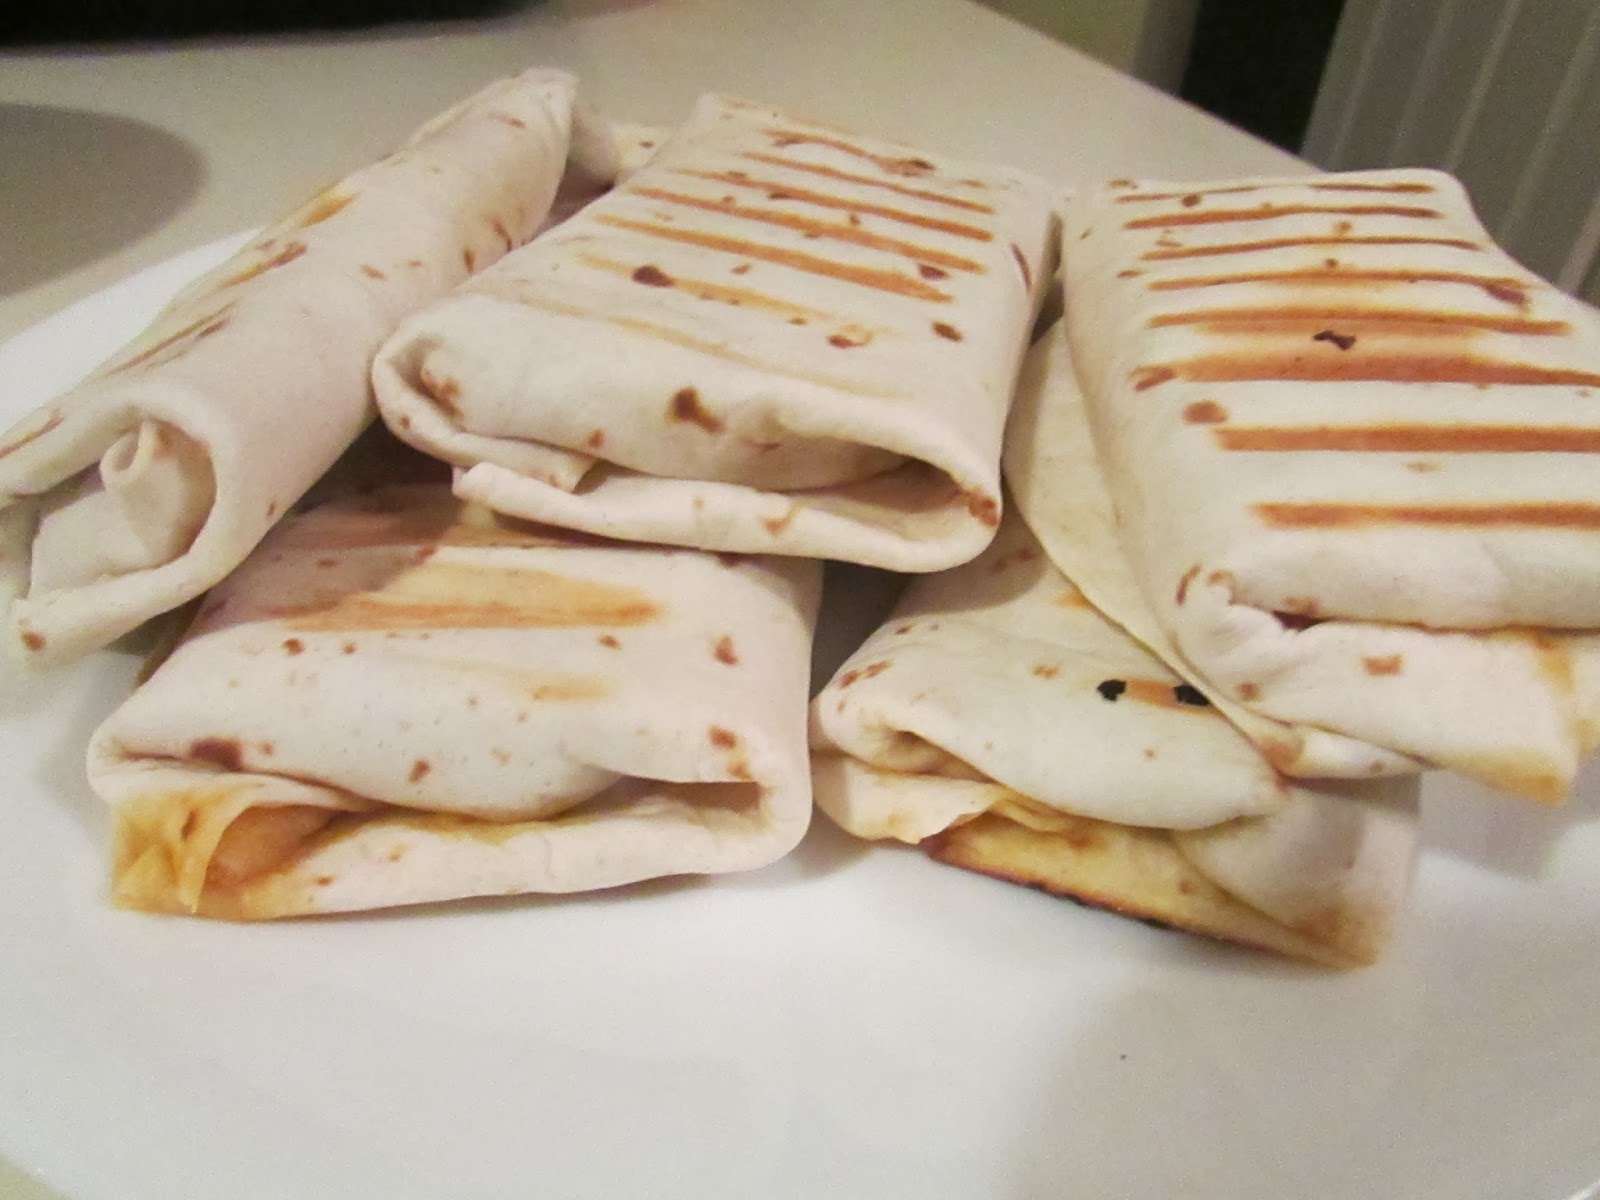
Grilled Bacon Jalapeño Cheeseburger Wraps


So I had some ground beef that I was going to use for dinner the other night, and originally I was going to make sloppy joes. I had burger buns and the sloppy joe mix all ready to go for a nice quick dinner. Then I came across this idea for grilled cheeseburger wraps on pinterest, and I knew that I had to do it. 

INGREDIENTS:

  • 1 pound ground beef
  • 2 tablespoons ketchup
  • 1 tablespoon mustard
  • 1 tablespoon worcestershire sauce
  • salt and pepper to taste 
  • 1/2 diced onion
  • 4 slices of bacon, cooked and crumbled
  • 4-5 jarred jalapeños dices (you can do more depending on taste)
  • flour tortillas (burrito sized)
  • shredded cheddar cheese
In a skillet over medium high heat, brown the hamburger and drain of excess grease.

Add in the onion and cook for 1 minute and lower the heat.

Add in the ketchup, mustard, worcestershire sauce, bacon and jalapeños, stir until well combined.

Take a flour tortilla and place a little cheese in the middle and then the hamburger mixture. Fold burrito style and make sure the ends are all tucked in so nothing can get out.

Grill on a panini press or in a skillet until lightly browned. 


These came out so good. I really wish I had made more. Mike had 2 1/2 my dad had 2 1/2, I had 1 1/2 and Maxx had a half even though he had already eaten earlier. Next time I'm going to make extra filling and just make a ton. They're like adult hot pockets, but way better. This is so easy, it would be a great thing to make for a party or game day. Cut them in half or use taco sized to make a good sized appetizer. I almost forgot, I served these with my baked potato wedges and fry sauce. So yummy, I can't wait until I make these again. Cheers!


Baked Potato Wedges


I made these the other night and they came out so awesome! I've never made home made fries like this before. Every time me and Mike try to make fries, they are shoe string thin and soggy and mushy, so I decided it was time for a change. After making my amazing baked potatoes a few weeks ago, I knew that was the direction I wanted to head it. Something about baking them on the parchment paper gives it the right amount of brownness and crisp. 

INGREDIENTS:

  • Potatoes ( Russet is best because the skin comes out great but any kind will do)
  • 1/4 cup olive oil
  • 1/4 teaspoon salt
  • 1/4 teaspoon pepper
  • 1/4 teaspoon paprika
  • 1/4 teaspoon garlic powder
  • shredded parmesan cheese (to add on at end)
Preheat oven to 450

Wash & cut potatoes into wedges by cutting lengthwise in half then slice each half into 3 slices.

Toss potatoes, oil and seasoning together in a large ziplock bag until they are coated.

Line a baking sheet with parchment paper, and place potatoes on lined sheet.


Bake for 30- 35 minutes (or until potatoes are cooked through and browned), flipping the potatoes once half way. 


Toss the wedges with a little cheese at the end while they're hot. Serve and Enjoy!


We actually ate these with fry sauce ( ketchup and mayo), and they were so good! I will never make fries any other way again! Cheers!


Turkey Pot Pie


I made this pot pie with left over roasted turkey, but you can just as easily replace that with chicken if thats what you have on hand. I usually do chicken. This is a recipe that is so easy to do if you have frozen or canned veggies laying around you can whip this together in no time. I got this particular recipe (but for chicken) from my friend Laurel 2 or 3 years ago. I've stuck with it the whole time and I just love the way this comes out. The gravy and crust comes out just like the chicken pot pies we all know and love. 

INGREDIENTS:

  • 5 tablespoons butter
  • 1/3 cup bisquick
  • 1/2 finely chopped onion
  • 1 teaspoon salt
  • 1/2 teaspoon pepper
  • 1 1/2 cups water
  • 1/2 cup milk
  • 1 1/2 teaspoon chicken bouillon 
  • 2 cups shredded or chopped turkey (or chicken)
  • 2-3 cups of veggies (use canned or frozen whatever you'd like. This dish I used frozen peas and carrots, canned corn, and potatoes)
First since I used a fresh potato, I peeled and diced it then threw it in a pot to boil until soft. There's nothing worse then a raw, crunchy potato in pot pie. When the potato pieces are fork tender, drain and set aside. Set aside the rest of the veggies you are going to be using, and the turkey or chicken in a bowl so it's all ready when you need it.


Melt butter in a large cast iron skillet then add in bisquick, onion, salt and pepper all at once and stir until it becomes bubbly.


Add in milk, water and chicken bouillon stirring constantly for 1-2 minutes until it starts to boil and thicken. Stir in all of your veggies and meat into the sauce. (Taste and make sure all the seasoning is correct, add more salt or pepper if necessary). Reduce the heat to low and make the topping.


Topping is 2 cups of bisquick, and 1/2 cup of water. Combine well and roll out into an approx 9x13 rectangle.


Transfer pot pie filling to a 9x13 baking dish, and cover with the bisquick crust you rolled out.


Bake at 425 for 15 minutes.


Once you've made a home made pot pie this way and see how easy and delicious it is, you'll never buy a frozen one again! Cheers!

Tuesday, January 21, 2014

Sweet Balsamic Baked Drumsticks


I  made these drumsticks the other night, and they were FANTASTIC!! I served them with a nice little side salad and my new awesome way to make baked potatoes.

INGREDIENTS:
  • 1/4 cup balsamic vinegar
  • 1/4 cup honey
  • 1/4 cup light brown sugar, packed
  • 2 tablespoons low-sodium soy sauce
  • 3 garlic cloves, minced
  • 1 tablespoon minced fresh ginger
  • 1/2 teaspoon fresh cracked black pepper
  • 6 chicken drumsticks, about 1.25 pounds
  • 1 tablespoon sesame seeds, lightly toasted
  • a few pinches chopped green onions

In a medium bowl, whisk together balsamic vinegar, honey, brown sugar, soy sauce, garlic, ginger and cracked black pepper. Pour into a large ziplock bag and add chicken drumsticks. Shake to coat chicken and refrigerate for 8 hours, or overnight, giving the bag a shake whenever you think about it.


Preheat oven to 400°F. Line a rimmed baking sheet with foil.
Remove the chicken from the bag, reserving the marinade, and place the drumsticks on the rack. Bake the drumsticks, on the middle oven rack, for 25 minutes.
While the chicken is baking, place the leftover marinade in a small saucepan. Bring the marinade to a boil, then reduce the heat to a slow simmer. Cook over low heat, stirring as needed, for about 15 minutes or until thickened.

Remove drumsticks from oven (after first 25 minutes of cooking) and heavily coat with the thickened marinade, using a silicone pastry brush. Return to the oven and cook for 10 more minutes. Coat the drumsticks again and return to oven to cook for 5 more minutes.
Coat the drumsticks one last time, with any remaining sauce, and sprinkle with sesame seeds and green onions.

These were amazing. And the best part was, it was all with ingredients that I always have in the house! Chicken drumsticks are such a great, and inexpensive meat to play around with in the kitchen. Give it a try! cheers!

Chunky Tomato Sauce and Sausage with Spicy Rigatoni


The hubs was working late last night and I wanted to make something that would still be good sitting in the microwave for a little bit until he got home. Also, I had a limited amount of meat stored in my freezer to be working with… (separating meats). So I decided on using a half a bag of stored italian sausage (2 1/2 links), and make a chunky tomato sauce and spicy rigatoni. This was the perfect amount of food ( The kids even had it, I just added the extra heat into it after they had already eaten).


INGREDIENTS:

  • Mild italian sausage ( I used 2 1/2 links)
  • 1/2 diced yellow onion
  • 1 teaspoon diced garlic
  • 1 can petite diced tomatoes
  • 1/2 cup red wine
  • 2 teaspoons flour
  • salt
  • pepper
  • powdered garlic
  • red pepper flakes
  • butter
  • italian shredded cheese
  • rigatoni pasta
First we want to start browning the sausage links in a large cast iron skillet, let it go on medium high heat until all sides are brown.

Then add the diced onion, let it cook for a few minutes until starting to brown, then add the garlic, cook for another minute then add the can of diced tomatoes.

Let that cook for a minute or two then take out the sausage links, cut into 1/2 inch rounds and return to the pan. Add in the flour, let cook for another minute and thicken up- then add the red wine. Reduce heat, and let this simmer for a few minutes before adding in the salt, pepper, garlic powder and some red pepper (to taste). Keep heat on low and cover for 15 minutes.

Cook pasta according to directions, and after you drain it- add in some butter, salt, pepper, red pepper flakes, and italian cheese. 

Make bowls with pasta and top with the chunky sauce and some more cheese.

Adjust all of the seasonings when you are cooking to your own taste.

This was an awesome sauce and I really enjoyed eating this pasta dish with a nice side salad last night! Cheers!


How I Buy Meat and Divide For Meals


I just wanted to write a quick post of how I buy meat for the week, and divide it into enough for meals and freeze it.  I don't buy a ton of meat, really I just want enough to have a little in each meal- then supplement the rest with veggies and (mostly starch… ugh I know.)  

Now that my youngest is almost 2, I try and make every dinner something that the 4 of us can enjoy. If it's going to be something really weird and that I know the kids won't like, I'll supplement their protein portion for something a little more kids friendly. But regardless, for the most part the meat I buy I portion into semi small bags that will be enough for the 4 of us for dinner.

This particular shopping trip I bought a big pack of chicken thighs (split into two packs of 3 each) , a smaller package with 2 thin steaks (split into 1 steak each ), a pound and a half of hamburger (2 baggies of hamburger), a pack of pork sirloin strips (split into 2 bags), and a 4 pack of small pork chops (split into bags of 2 each).

So all together it pretty much got me 10 meals out of all of that meat. The smaller cuts of meat like the steak and the pork chops, I can cut up and pound out into cutlets. (my cutlet recipe: cutlets.  And sometimes the kids just want chicken nuggets or hot dogs so I don't really have to worry about a fancy dinner for them and can just make something for me and Mike. 

Separating my meat like this does make my shopping trips a little more cost effective. And Makes sure that I try to incorporate more veggies into my meals. Cheers!

Tuesday, January 14, 2014

Adult Famous Bowl (Onion Pulled Pork)


"Adult Famous Bowls" - as me and my husband like to call them (after the KFC Famous Bowl), are a really awesome- easy and filling meal that isn't just for adults. The bowls differ depending what we have in the house, but usually consist of a layering of potatoes, corn, meat and shredded cheese. This one that I made last night was especially delicious, if I do say so myself. This is how it did it:

INGREDIENTS:

  • small piece of pork loin ( we had about a half pound of frozen pork loin, you can pretty much use any kind of pork since its going in the crock pot- it just depends on how many people you're serving.
  • French onion soup ( we had about a cup and a half of left over home made soup from the day before, but I'm sure canned would be fine. You just need the liquid to cook the pork in)
  • can of creamed corn
  • potatoes for baking
  • shredded cheddar cheese (for topping)
  • scallions ( for topping)
  • dollop of plain greek yogurt (for topping)
Place the pork in the crock pot with the french onion soup, cook on low for about 8 hours until you can pull it apart.

Bake some potatoes, this is the awesome recipe I used: easy baked potato

When the pork and potatoes are done, you are ready to assemble. Place the baked potato in the bottom of a bowl, break up a little with a fork and add a little butter. Then add your desired amount of creamed corn on top of the potato. Top that with the onion pulled pork. Finally add the cheese, greek yogurt and scallions if you'd like as a final touch. 

I love when we make these bowls. They truly are just the right amount of everything, and will fill you up. This whole meal cost under $5 to make, and with all ingredients that I had in the house already. Try it out, you won't be disappointed! Cheers!

Easy Amazing Baked Potato


I wasn't going to make this a blog post, but I made my baked potatoes this way last night… and oh my - they came out freaking amazing. I'm going to do my baked potatoes like this from now on. The skins were even awesome, and we all know thats where the nutrients are!

INGREDIENTS:

  • Baking potatoes (brown skinned, however many you want to bake)
  • Olive Oil
  • Sea Salt
  • Parchment Paper
Preheat oven to 400

Wash and dry the potatoes, and cut them in half long ways.

Place a piece of parchment paper on a baking sheet, drizzle olive oil on it and sea salt.

Place the potatoes, cut side down on the olive oil and salt, then drizzle a bit more oil and salt over the tops. Make sure the potato halves are completely covered in both oil and salt.

Bake 30-40 minutes until the cut side is browned and the whole potato can be pierced with a fork.

I wish that I had taken a picture of them when they were all done, especially the nice brown color of the bottom of the potatoes. They were crispy and salty and delicious. Try it this way the next time you are going to bake a potato! Enjoy!


Bibimbap (My version of this Korean rice dish)


My husband and I had this a few years back at a restaurant. Since then we've made a few variations of it, mostly consisting of rice, a breaded cutlet of some sort and an egg on top. If  you've never heard of this amazing dish here is a basic description: Bibimbap. This bowl of deliciousness that we made the other night was by far the best one that we ever concocted together. This might seem like a lot of components, but you really need each layer and texture to elevate this and give you the complete experience.

INGREDIENTS: (This made 2 very large adult bowls and 2 kids bowls)

  • 3 cups cooked white rice
  • 1 cup chopped iceberg lettuce
  • 1/2 cucumber sliced thinly (julienned)
  • 1/2 carrot sliced thinly (julienned)
  • 1 tablespoon rice wine vinegar
  • 1/4 teaspoon of sugar
  • Frozen Birds Eye szechuan vegetables in a sesame sauce ( I only used this for the two adult bowls, I used corn for the kids bowls)
  •  sesame seeds
  • 5 eggs
  • Teriyaki sauce 
  • sliced scallions
  • 2 medium sized boneless pork chops
  • 1/2 cup italian bread crumbs
  • 1/2 cup panko bread crumbs
  • flour for breading
  • vegetable oil for frying
First thing to do is make our pork cutlets. I cut each chop into 3-4 small pieces, cover them with plastic wrap and using a meat mallet on a cutting board pound them out until they double in size and are very thin. Don't beat them so much they break apart. I've become the cutlet master and I'm able to make 8 cutlets out of 2 pork chops. It takes a little practice but it's an awesome money saving tip.

Next we want to set up a breading station, 3 bowls- one for flour (season with salt and pepper), next an egg beaten with a little water, and finally a bowl with the breadcrumbs and panko. This is the breading station I do for all of my cutlets and they come out great. Dredge the pork in the flour, then the egg and then the breadcrumbs. Make sure each step the pork is completely covered with that ingredient for a thorough breading. Once you have all of your cutlets breaded, heat up enough veggie oil in a skillet to cover the bottom and once it heats up completely over medium high heat start frying your pork. 2-3 minutes on each side or until a golden brown. They should be thing enough that it won't take very long at all to fry them. Set aside all of the fried cutlets on a paper towel lined plate. After they've cooled slice into strips.


Next take your julienned carrots and cucumbers and in a bowl toss with a tablespoon of sesame seeds, rice wine vinegar and sugar. You should do this according to your taste, if you want it more sweet or vinegar tasting you can adjust how much you add. Set those veggies aside.

You can now prepare the szechwan veggies according to the package ( I know this seems like a cop out when you're going through all the trouble to prepare the other components, but thats exactly the point. It's easy and really tasty for the price and trust me after you fry up those cutlets, you're not going to wait much more to eat.)


In a small pot start boiling water to poach your eggs. Once the water comes to a boil, lower the heat a little and add the eggs. It only takes about 3 minutes to get them poached, we want it firm but the yolk nice and runny when you break it.

Now for assembly:

Place some chopped lettuce in the bottom of the bowl, and top with the rice.


Then add the szechwan veggies on top of that.


Next add the sliced pork cutlets.


Top that with the sliced cucumber, carrot mixture.


Then the poached egg.


And finally finish it off with a drizzle of teriyaki sauce, scallions and some sesame seeds.


 This was the mini version I made for the kiddos:


I know this seems like an awful lot of steps, but I swear to you its worth it! Just writing this and looking at these pictures now, my mouth is literally watering. I can't wait until we make this again. And I'm for sure, going to make it this exact same way!