Tuesday, May 20, 2014

Chicken and Broccoli Alfredo Stuffed Shells


Made this tonight for dinner- and holy crap was it delicious. I didn't know exactly how many shells/ how much broccoli and chicken to make so I kind of winged it. I ended up having leftovers of everything - but I'll use it for lunches during the week. So the amounts below filled a 9x13 pan. The alfredo sauce was super easy too. 

INGREDIENTS:


  • 1/2 box of large shells (for stuffing) cooked al dente (not all the way through)
  • 1- 1 1/2 cups of cooked chopped chicken (I used thin chicken breasts seasoned with salt, pepper and garlic powder- cooked in a skillet with veggie oil and butter until browned- then chopped it up)
  • 1 - 1 1/2 cups of steamed broccoli
  • 1 stick of butter
  • 2 cloves of garlic minced
  • 1 pint of heavy cream
  • 2 tablespoons of cream cheese
  • 1 cup grated parm cheese
  • salt and pepper to taste
  • 1/2 cup tomato sauce or diced tomatoes
  • 1/3 cup shredded mozzarella 

To make the alfredo sauce, first in a medium sauce pan melt the butter. Add in the minced garlic and cook for about 2 minutes over medium heat. Add in the heavy cream and cream cheese- and bring to a simmer. Simmer for about 5 minutes then stir in the parm cheese. Whisk constantly or the cheese will stick to the bottom. Reduce heat to low, add salt and pepper to taste. Let thicken for a minute or two then remove from heat.


In a large bowl- combine the broccoli, chicken and about 1/2 cup of the alfredo sauce. 


Spread the tomato sauce or diced tomatoes in the bottom of a 9x13 baking dish.


Spoon the filling into the par cooked shells, and arrange in the baking dish until all of the filling is used.


Spoon as much of the extra alfredo sauce on top of the shells as you want - then springing the mozzarella cheese on top evenly. 


Cover with tinfoil- and bake at 350 for about 30 minutes.

Serve with extra alfredo sauce on the side if you want. 

These were freaking awesome (and filling). We had our shells with a nice salad on the side, and have a bunch of leftovers for lunch tomorrow. A new fun way to make stuffed shells. I will definitely be making this again in the future. Cheers! 

Adapted from: pasta alfredo

Loaded Potato and Buffalo Chicken Bake


Warning! This is highly addictive. I suggest doubling the amount that I made. Serve for dinner, or an appetizer... this recipe will make everyone happy. I promise!

INGREDIENTS:

  • 1 pound un cooked chicken, cubed ( I used boneless skinless chicken thighs)
  • 1/4 cup of buffalo sauce (Tabasco, Buffalo Marinade, franks red hot- whatever is your favorite)
  • 4-6 medium potatoes, washed and cubed
  • 1/4 cup veggie oil
  • 4 slices of cooked bacon crumbled
  • 1/4 cup sliced green onion
  • 1/2 cup shredded cheddar
  • 1/3 cup crumbled blue cheese
  • 1/4 cup blue cheese dressing
  • 1 teaspoon black pepper
  • 1 teaspoon salt
In a medium bowl combine the cubed potatoes, veggie oil, pepper, salt and paprika. Scoop into a 9x13 baking dish.


Bake at 475- stirring every 15 minutes, until the potatoes are cooked through and browned- about 40 minutes. Remove from the oven, and drop temp down to 400.


While the potatoes are cooking, add the cubed chicken into the same bowl the potatoes were in, with the oil and seasonings. Add the buffalo sauce- and let marinate while the potatoes cook.


Once the potatoes are out of the oven and cooked, spoon the raw chicken evenly over the potatoes. Do not just dump the chicken with all the sauce over the potatoes, it will be way to wet.

Bake at 400 for 15-20 minutes, until the chicken is cooked through.

Remove from oven, stir in the blue cheese, and blue cheese dressing. Add the bacon, green onions and cheese to the top- then bake for another 5-10 minutes until the cheese is melted.


This is a little labor intensive, and takes a bit to finish- but it is completely worth it. Obviously not the healthiest thing in the world- but we ate ours with a salad... so that makes it a little better right? Cheers!


Chicken Cordon Blu pt. Deux


Last month I made Chicken Cordon Blu Rolls. Fabulous! With an amazing Creamed Spinach with Mushrooms. I tried a slightly different method a few weeks ago, and it came out pretty good. I'm on the fence as to which way I like best, they were equally delicious.

INGREDIENTS:

  • 1 Package of thinly sliced chicken breasts (about 5)
  • salt and pepper
  • 1/4 pound of deli ham
  • 1/4 pound swiss cheese
  • 1 cup bread crumbs
  • 2 tablespoons melted butter
In a baking dish lay out the chicken breasts. Season with salt and pepper. 


Divide the ham evenly between the tops of all the chicken. 


Top each chicken and ham with swiss cheese. 


In a small bowl combine the melted butter and bread crumbs. Sprinkle bread crumbs over each chicken. 


Bake at 350 for about a half hour, until chicken is cooked through. 


Like the last time, we had our chicken cordon blu's with the creamed spinach and mushrooms. Try out both recipes and see which one you like the best! Cheers!

Adapted from: Easy Chicken Cordon Blu


Bacon Cheeseburger Pie


You know I'm always up for trying something new (and potentially something the kids will love ) in my kitchen. So when I came across this recipe I knew I had to do it. It was actually easier than it seems. The filling of the pie is very similar to what I did in my bacon cheeseburger wraps. The kids each ate 2 servings (covered in ketchup, of course), and loved that it was a "pie". 

INGREDIENTS:
  • 1 pound ground beef
  • 1 onion, chopped
  • 5 slices cooked bacon, crumbled
  • 1/3 cup panko bread crumbs
  • 1 teaspoon yellow mustard
  • 3 tablespoons barbecue sauce
  • 1 tablespoon ketchup
  • 2 teaspoons Worcestershire sauce
  • 1/2 teaspoon black pepper
  • 3 pickles diced
  • 2 cups shredded cheddar cheese
  • 1 egg
  • 1/4 cup milk
  • 1 uncooked pie crust
In a skillet cook the beef and onions together, until cooked through. Drain grease off. Add in the panko, mustard, ketchup, bbq sauce, worcestershire sauce, pepper, pickles and crumbled bacon. Mix to combine.

Put the pie crust in the bottom of a pie pan, and fill with beef mixture.

In a small bowl, whisk together the egg and milk- pour over the beef mixture in the pie.

Sprinkle cheese over the top of the pie, and crimp the access pie crust in.

Cover the edge of the pie crust with tin foil, to prevent burning.

Bake at 400 for 15 minutes, then remove the foil, then bake an additional 15 minutes.

Sprinkle with more diced pickles for garnish if you want.

We had our delicious cheeseburger pie with some potato salad, and corn on the cob. It was on the smaller side and fed us 4 just fine, but if you're cooking for more- or want leftovers I suggest doubling the filling recipe to make a bigger pie, or make 2 pies, since 2 crusts come in a package. Cheers!


Adapted from: Bacon Cheeseburger Pie

Pilgrim Casserole


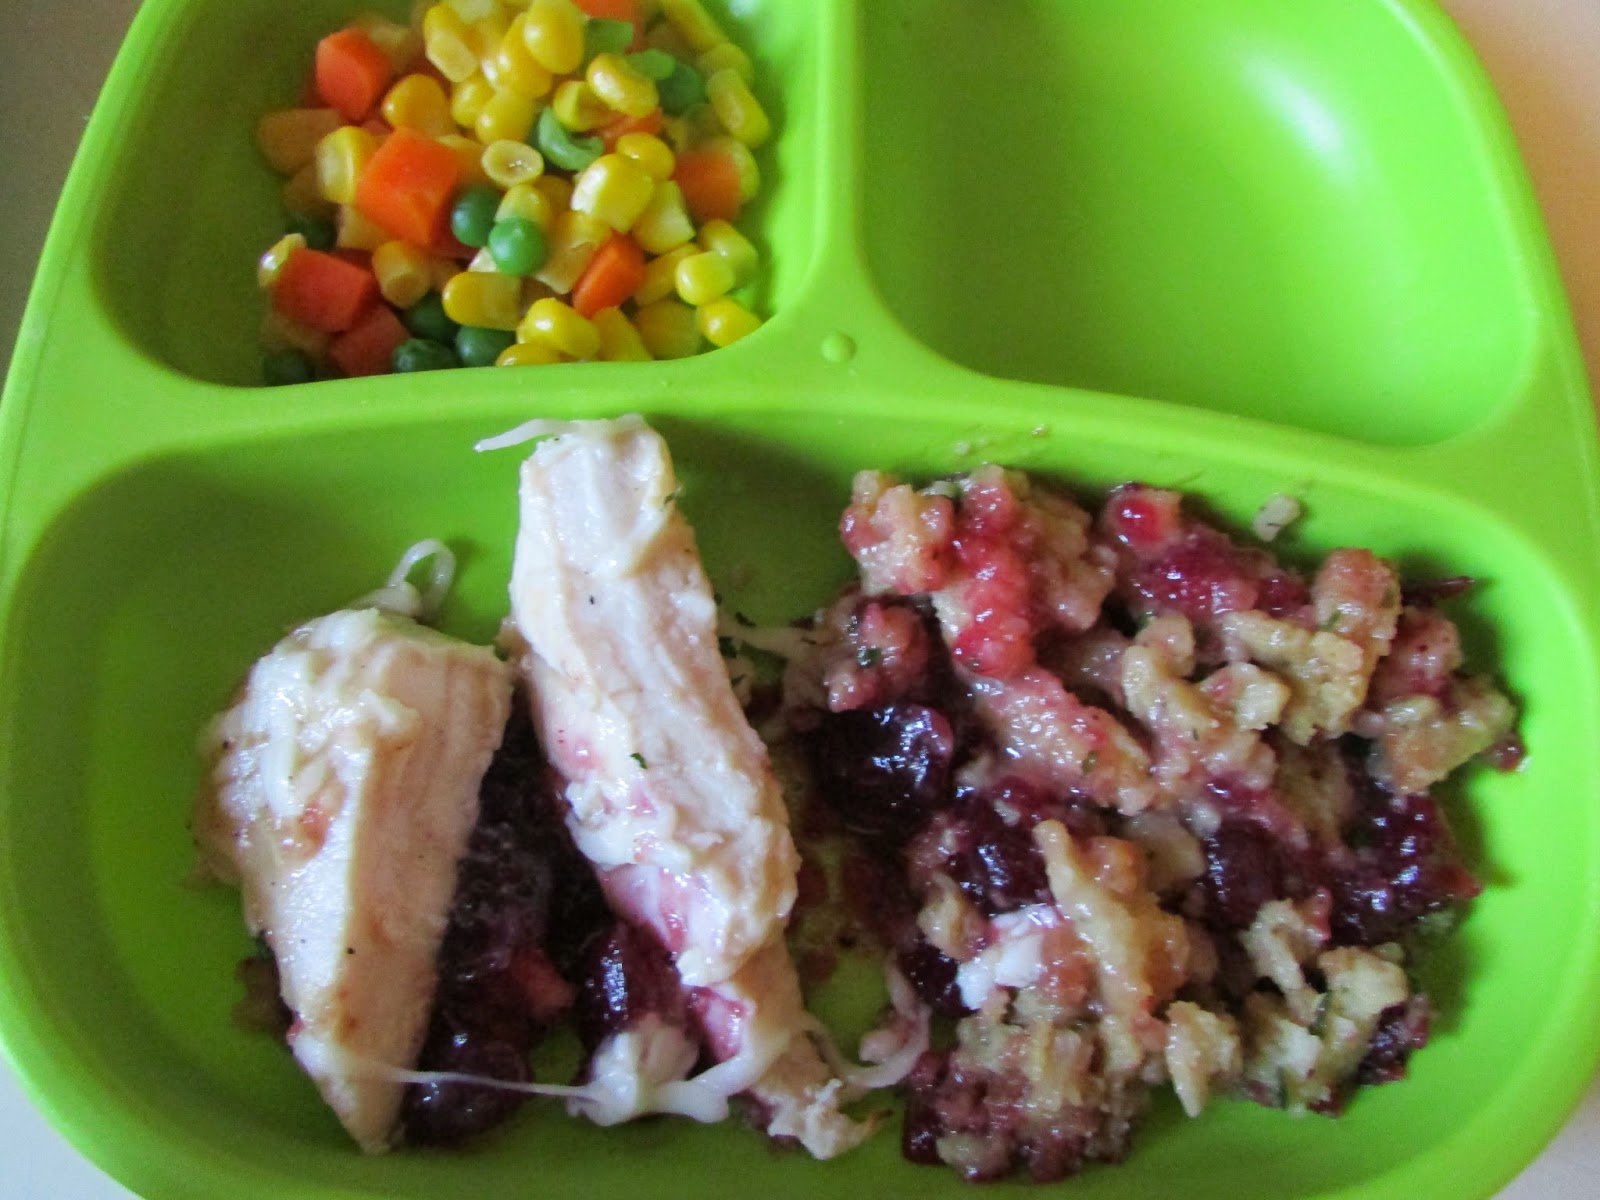
I saw this a few weeks ago on Rachael Ray's, Week in a Day show. Seeing this on T.V made me crave this so bad. I'm a sucker for Thanksgiving subs- you know with the turkey,  cranberry sauce, and stuffing all together on a roll. Yes! Anything to do with putting all of the sweet and savory of Thanksgiving together in one package- I'm for it! Put it this way- I made this twice in the past two weeks.
Its awesome and amazingly easy. I did cheat a little bit by using canned cranberry sauce- and boxed stuffing... but having this all complete in less than 45 minutes - it's kind of worth it. Plus the kids freaking devoured it. Putting all ingredients in one casserole, the kids can't only eat the cranberry sauce... score one for Mom!

INGREDIENTS:

  • 1 box of turkey stuffing
  • 1 can of jellied whole cranberries
  • 3 teaspoons sugar
  • 3 teaspoons water
  • 1 pound of turkey breast (I used a package of turkey cutlets)
  • 1 cup of buttermilk
  • 1 teaspoon each of salt and pepper
  • 1 teaspoon cayenne pepper  
  • 1/2 cup of gravy (home made, store bought- whatever works)
  • 1/2 cup of mozzarella cheese 
In the morning- combine the buttermilk, salt, pepper and cayenne together in a large gallon ziplock bag. Add in the turkey breast. Seal the bag and place in a bowl (incase of leakage) in the fridge for about 6 hours.

Preheat oven to 325, remove the turkey from the buttermilk- pat dry with paper towels- and place on a baking sheet. Bake for about 20- 25 minutes (depending on thickness), until the turkey is cooked through.

While the turkey is cooking you can prepare the stuffing according to directions on the box,  or use your own home made stuffing. Set aside.

In a small pot, combine the cranberries- sugar- and water, mix. Heat over low until slightly warmed. Set aside.

Get your gravy ready. Wether you are making home made, or store bought. And set that aside.

Once the turkey is done, let cool for about 5 minutes- then slice it up.

To assemble the casserole- Butter an 8x8 baking dish. 

Place the stuffing on the bottom.


Followed by the cranberry sauce.


Then the sliced turkey. Spoon the gravy over the turkey, and top with the mozz cheese. 


Bake at 350 for 15 minutes, until the cheese is melted and the casserole is heated through.

So the second time we made this, Mike suggested we put crescent roll dough over the top. We did, and baked it until the crescent rolls were golden brown. It was really good- when you ate it right away, but the longer it sat the soggier the crescent rolls got. I'd say do the original recipe, the way I posted it above- but try it out if you want to! 

This is an awesome weeknight dinner, that can be made quickly and is completely satisfying. Leftovers? Hey, throw it on some bread and have yourself a Thanksgiving sandwich! You're welcome. Cheers.


One of the kiddo's plate


Adapted from: Pilgrim Casserole

Wednesday, May 7, 2014

Penne alla Vodka


This was my Meatless Monday meal for this week. I've really been dying to try making this for a while now. Found a great recipe from one of my favorite food bloggers The Pioneer Woman. She always had the best, easiest recipes to follow. This really took no time at all to make- and the result was fantastic. You can make this in under an hour- and its so worth it!

INGREDIENTS:
  • 1 pound Penne pasta
  • 2 Tablespoons Olive Oil
  • 2 Tablespoons Butter
  • 1 medium sized onion, chopped finely 
  •  3 cloves of garlic, minced
  • 3/4 cups vodka
  • 1 can (14 oz) tomato sauce
  • 1 cup half and half
  • 1 pinch Red Pepper Flakes
  • 1/4 teaspoon (to 1/2 Teaspoon) Salt
  •  pepper to taste
  • 1 cup Grated Parmesan Cheese
Boil a pot of water and cook pasta according to the directions, do not over cook.

Heat the oil and butter in a skillet over medium/ high heat. Add onion and garlic and sauté for about 2 minutes- until onions become translucent.

Pour in vodka, stir and cook for about 3 minutes. Add tomato sauce and stir.

Reduce heat to low and stir in the half and half. Simmer on low, do not over heat. Add in salt, pepper and red pepper flakes to taste.

Drain the pasta and reserve some of the pasta water on the side incase the sauce thickens up to much- you can use it to thin it out some.

Add drained pasta to the sauce, toss to combine- add in the parm cheese.


Garnish with more parm cheese when you serve the pasta.

I served this lovely dish with a side salad- and yummy garlic knots. This is by far one of the best pasta sauces I've ever made. And I make a ton of sauce- and pasta. You need to give this a try if you're looking for an easy- out of the ordinary pasta dish to cook. You'll never even notice there is no meat involved. Cheers.


Adapted from: Pasta alla Vodka


Easy Garlic Knots


Made Penne alla Vodka two nights ago- and it just seemed fitting to have some sort of yummy garlic bread with it. I had this simple recipe from a while back that I decided to give a try.

INGREDIENTS:

  • Grands mini buttermilk biscuits (in the can)
  • 2 tablespoons melted butter
  • salt
  • pepper
  • garlic powder
  • italian seasoning
Preheat oven to 400 degrees. In a small bowl combine the melted butter and seasonings to taste.

Take each individual biscuit and roll out into a rope long enough to tie in a knot. Knot all of the biscuits and place on a baking sheet.

Brush each knot with half of the butter and seasoning.


Bake for about 8-10 minutes, or until golden brown.

Remove from oven and brush each knot with the remainder of the butter and seasoning mixture. Serve warm. 

These were seriously amazing, and so friggen simple to make. The original recipe calls for some parm cheese in the butter mixture, but I totally forgot to throw that in. Next time I will add it, but they were still great regardless. Cheers!


Sesame Ginger Teriyaki Meatballs


Found this recipe a few months ago and I was dying to try it. Finally got to make it last week- and trust me. It did not disappoint. It was actually pretty easy to do. I served these guys with simple "boil in the bag" jasmine rice- and lightly sautéed broccoli and mushrooms. All in all- a pretty amazing dinner combo. 

INGREDIENTS:

For Meatballs:

  • 1 pound of ground pork
  • 1 egg
  • 1/2 cup bread crumbs
  • 1 clove minced garlic
  • 2 tablespoons fresh grated ginger (make sure you peel the skin off the ginger before grating!)
  • 1/2 teaspoon soy sauce
  • 2 whole green onions- sliced
  • 1/2 teaspoon pepper
For Teriyaki Glaze:
  • 1/2 cup soy sauce
  • 1/2 cup brown sugar
  • 1/2 cup water
  • 1/2 tablespoon sesame oil
  • 1 tablespoon grated ginger
  • 2 tablespoons corn starch
  • 1 teaspoon sesame seeds
For the side:
  • 1 boil in bag serving Jasmine rice
  • Veggies of choice
Preheat oven to 400 degrees. Cover a baking sheet with foil.In a large bowl combine all of the ingredients for the meatballs. Roll into small balls, about 1 tablespoon of mixture, Place on baking sheet. Bake until golden brown, about 30-35 minutes.


While the meatballs are in the oven, boil your rice and prepare the veggies to your liking.


Also, you want to prepare your glaze. Combine the water, soy sauce, sugar, sesame oil, and ginger in a medium pot. Heat over a low heat, until the brown sugar is dissolved. 

In a small bowl- dissolve the cornstarch in just enough water to make it pourable. Pour into the pot with the rest of the glaze mixture. Turn heat up to medium high and stir the ingredients and cook until it starts to thicken. 

When the meatballs are done, transfer to a plate with paper towels to drain the excess grease. 

Then place in the pot with the glaze, and gently toss to coat all of the meatballs. Transfer the meatballs and glaze into a serving bowl and sprinkle with the sesame seeds.

Serve meatballs and glaze over rice- and with veggies. Garnish with some more green onion if you'd like too.

I really couldn't wait to type out this recipe and share this with you guys. This was so interesting and fun to make. The freshly grated ginger really gives it such an awesome kick. Try this out for yourself sometime, when the mood strikes you for some fake out take out! Cheers!


Adapted from: Teriyaki Meatball Bowls


Cornbead Sloppy Joe Casserole


I needed an easy sunday dinner about 2 weeks ago - and this was the winner! I had never made anything like this before, so it was really fun to try- and the kids devoured it. Instead of following the original recipe I read (using 1 box of Jiffy corn muffin mix), I did the cornbread recipe that was on the back of the cornmeal bag. It made way to much cornbread and it took forever to bake. Next time I will use the box of Jiffy- and I will save you the hassle and will include that method instead of my hair brained one.

INGREDIENTS:

  • 1 pound ground beef
  • 1 medium red onion, diced
  • 1 green bell pepper, diced
  • 3 tablespoons brown sugar
  • 3 tablespoons red wine vinegar
  • 1 tablespoon BBQ sauce
  • 1 tablespoon Worcestershire sauce
  • 1 (14 oz) can tomato sauce
  • 1 (8.5 oz) box Jiffy corn muffin mix
  • 1/3 cup milk
  • 1 tablespoon vegetable oil
  • 1 egg
  • 1/2 cup cheddar cheese, shredded
  • green onion for garnish (optional)
Heat a large skillet over medium/ high heat- and brown the hamburger until its almost cooked through. Drain off the excess grease (if there is any), then add in the onion and green peppers. Cook until the meat is cooked through.

In a medium bowl combine the brown sugar, vinegar, BBQ sauce, tomato sauce and worcestershire sauce. Then add the mixture to the skillet. Reduce heat and let cook about 5 minutes to thicken up.

In a bowl combine the muffin mix, milk, oil and egg. It will be a bit lumpy.

Transfer the sloppy joe mix to an 8x8 baking dish, then pour cornbread mixture evenly on top.

Bake at 350 for 25-35 minutes, until the cornbread is completely cooked through. Remove from oven and sprinkle with cheese.

I served this with a little green onion, and a side salad. I will for sure be making this again in the future, but will be doing it the right way. The amount of cornbread mix I made was way to much and completely over powered the dish. So use the corn muffin mix- and yours should come out perfect! Cheers!


Adapted from: sloppy joe casserole


Chicken and Dumplings pt 2


I attempted to make chicken and dumplings back in March, and it came out decent. I was trying to duplicate the way my friend Kristy does it- of course it didn't come close to the original. So when I set out to try it again, I wanted to find a completely new recipe. I found a really awesome one on Pinterest- and the result was amazing! Here we go...

INGREDIENTS:

  • 2 bone in split chicken breasts ( You can use left over shredded chicken/ pre cooked rotisserie chicken- you need about 2 cups of shredded chicken)
  • 1 small onion- diced
  • 1 teaspoon olive oil
  • 1 container (32oz) chicken stock
  • 1 can of cream of chicken soup
  • 1 cup of half and half
  • 1/2 cup of frozen peas and carrots
  • 1/2 cup of frozen corn
  • 1/2 cup diced mushrooms
  • salt and pepper to taste
  • 2 cups of Bisquick
  • 2/3 cup warm water
Start off by preparing the chicken. I had two bone in/ skin on chicken breasts. So the first thing I did was take the skin off and discard. Season the chicken with salt, pepper, and garlic powder- and bake at 325 for about 30- 40 minutes, or until the chicken is cooked all the way through. Remove from oven, let the chicken cool. Take the meat off the bones, and shred. Put chicken aside.


Place a large pot on the stove, add a little olive oil and sauté the mushrooms and onions over medium heat until tender- about 5 minutes. 

Add in the chicken stock, cream of chicken soup, half and half- season with salt and pepper. Stir and bring to a boil- then add the frozen veggies and the shredded chicken.

In a medium sized bowl combine the Bisquick and the warm water, stir until combined well.

Drop tablespoons of the Bisquick into the pot, try to space the dumplings evenly. Cover the pot and cook the dumplings for about 10 minutes, on medium/ low heat. Remove from heat and serve.

Before I served my chicken and dumplings, I carefully removed the dumplings from the pot with a slotted spoon- and placed on a plate. I did this so I could keep the dumplings from absorbing to much moisture and get soggy. We ate this in bowls- with a few dumplings on top and cranberry sauce on the side. The broth was so flavorful and all the veggies in it made me feel a little better about eating so much of it. The kids went crazy for it. This dish was more like a soup, but there isn't anything wrong with that. Believe it or not, it was even more flavorful the next day. Cheers!


adapted from: easy chicken n dumplings